メール通知設定
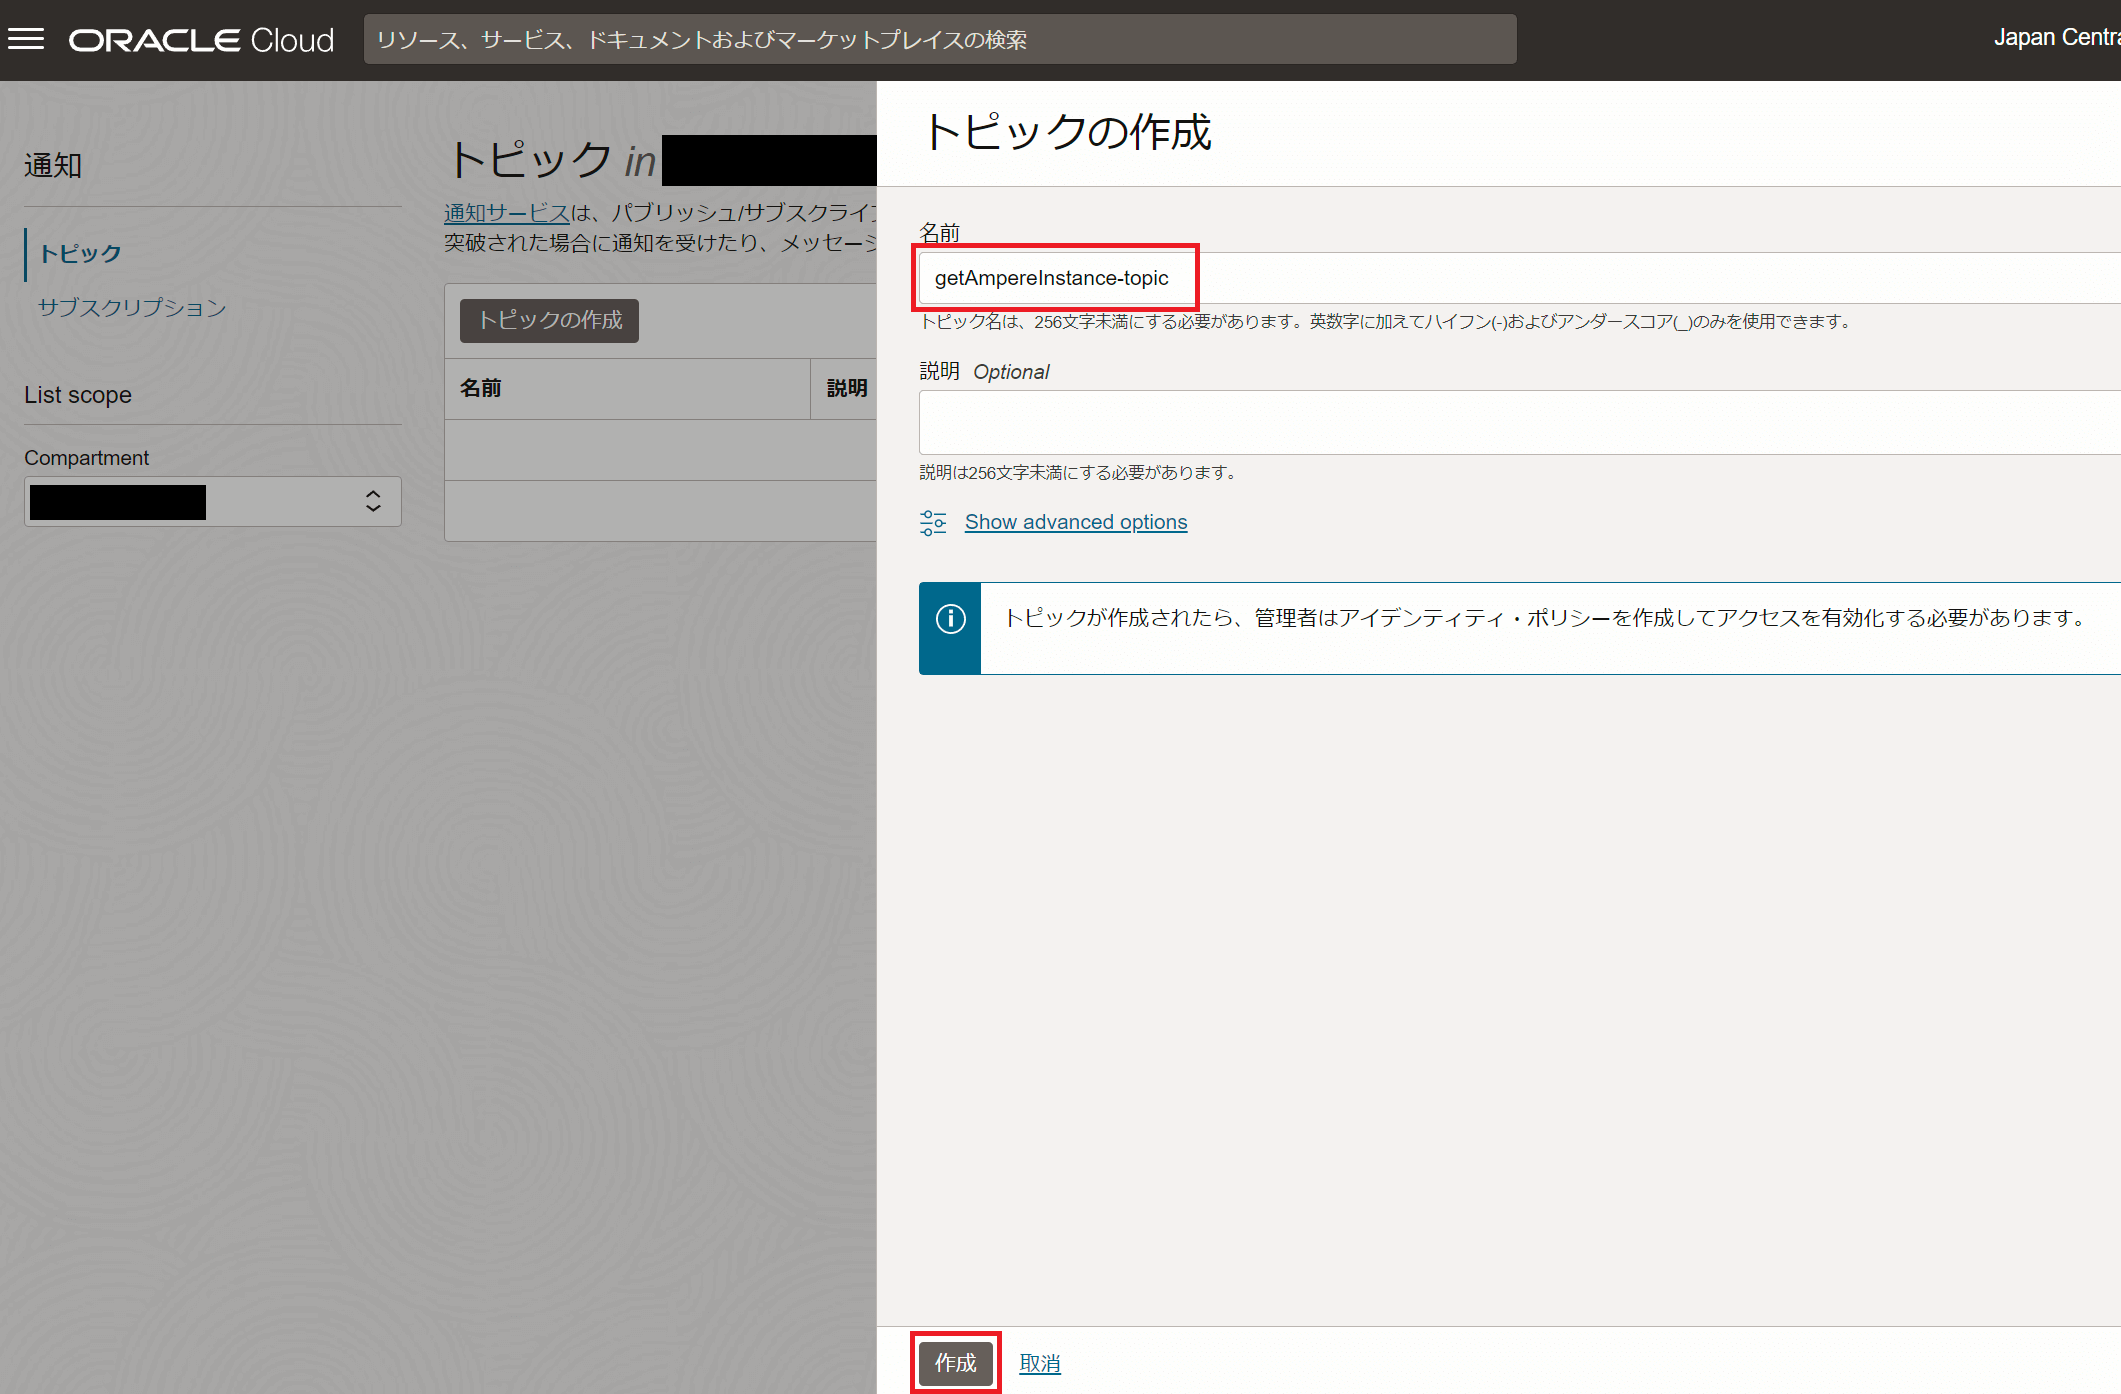
「OCI > 通知 アプリケーション統合」から「トピックの作成」で下記のように作成します。
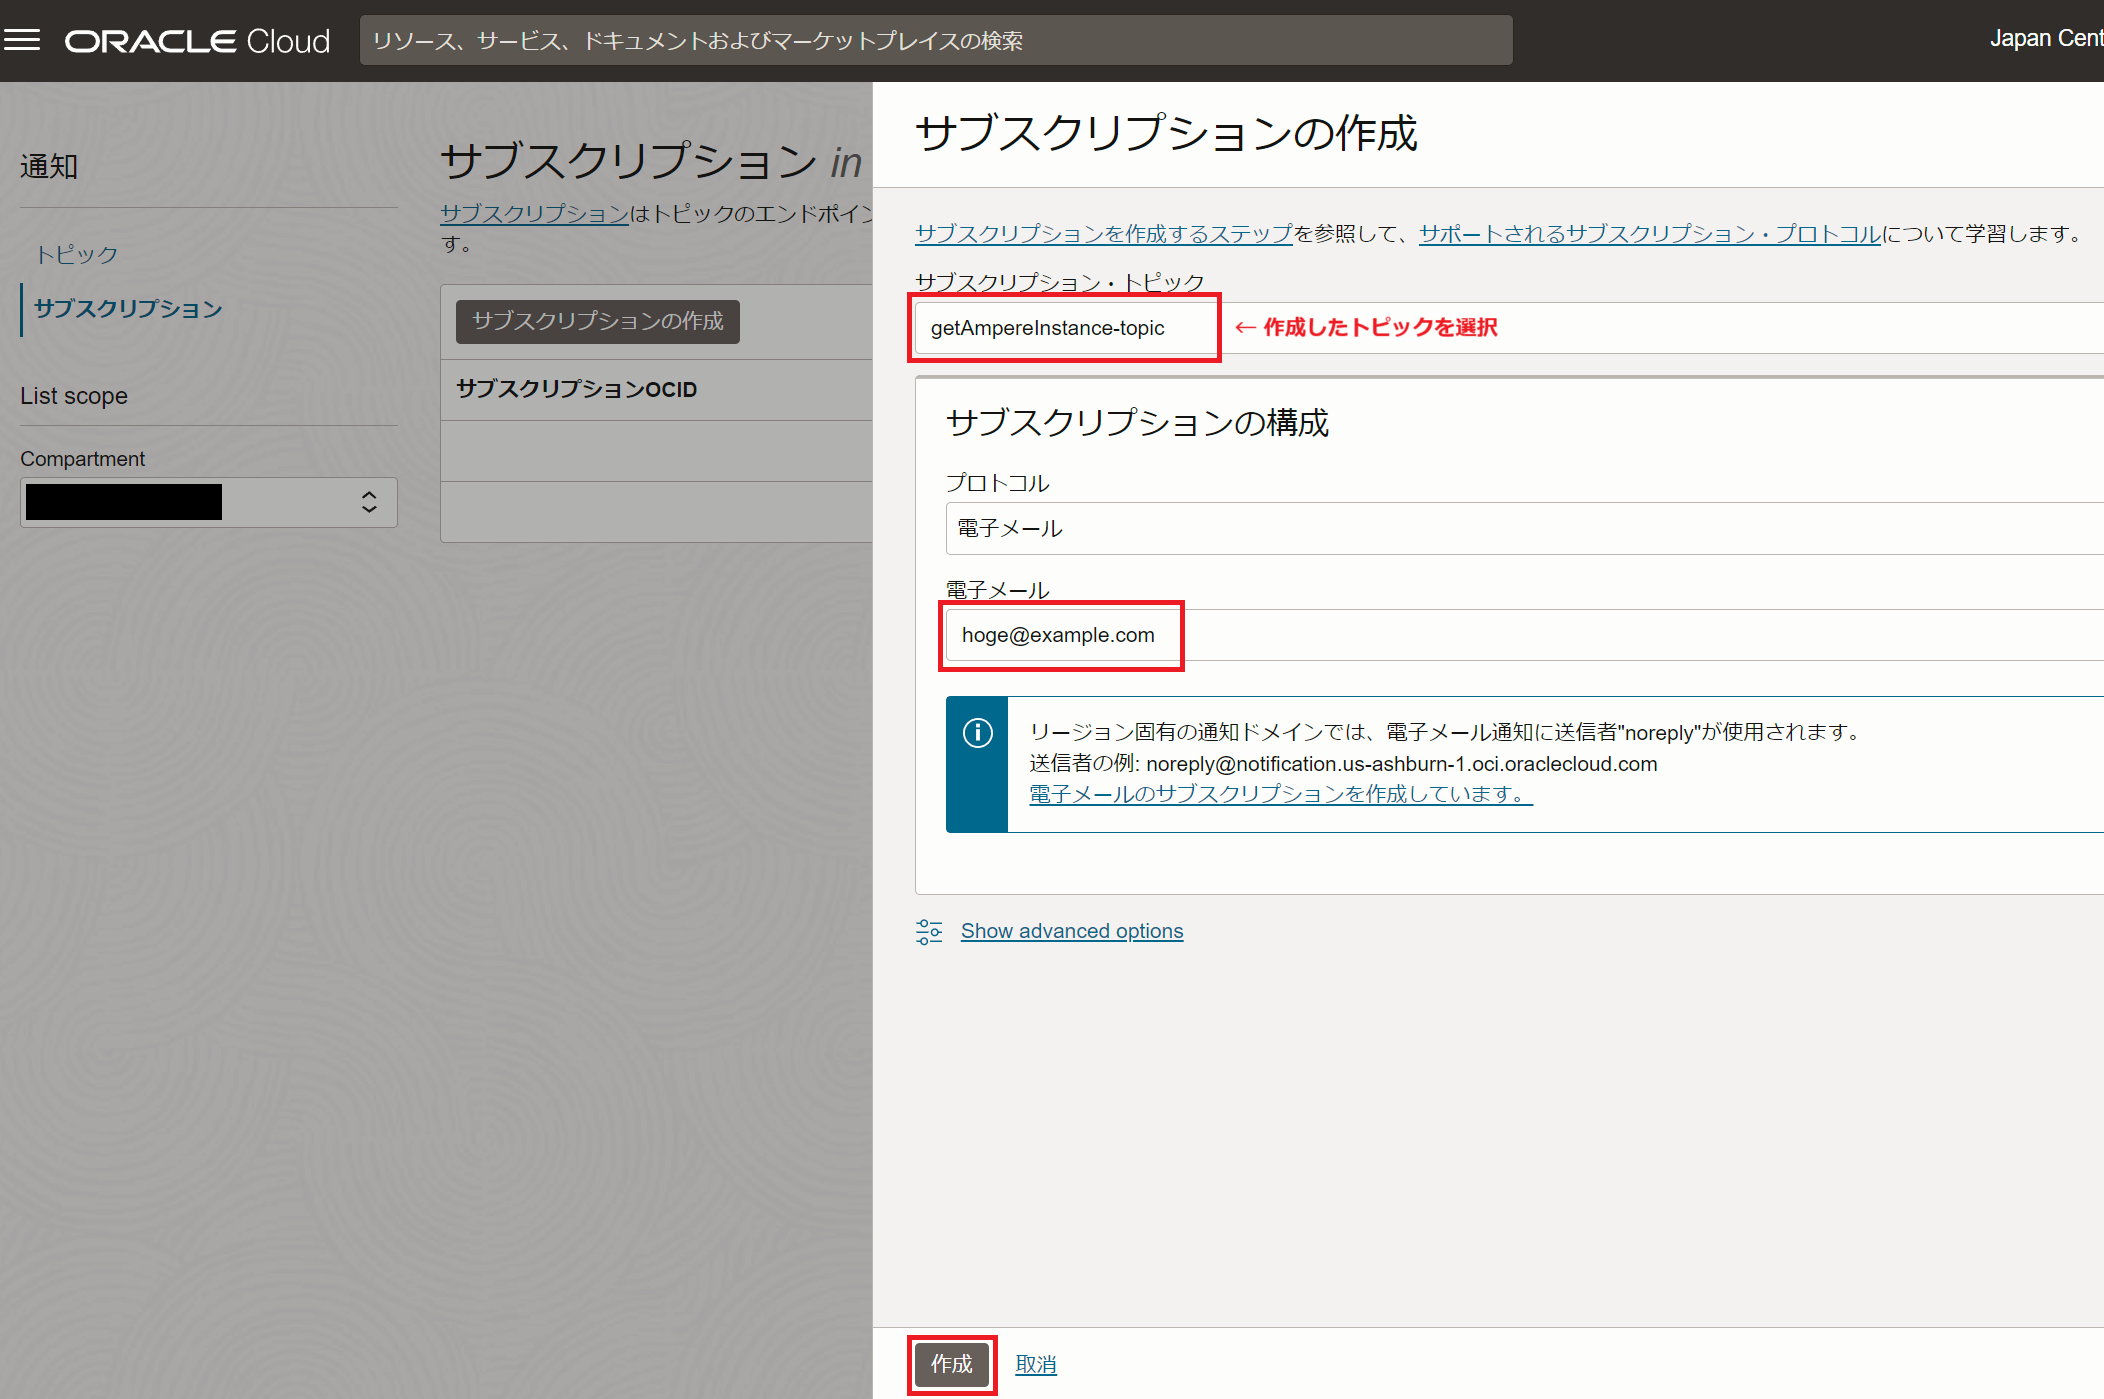
左ペインのサブスクリプションをクリックし「サブスクリプションの作成」で下記のように作成します。
※電子メールには受信可能な自分のメールアドレスを指定します
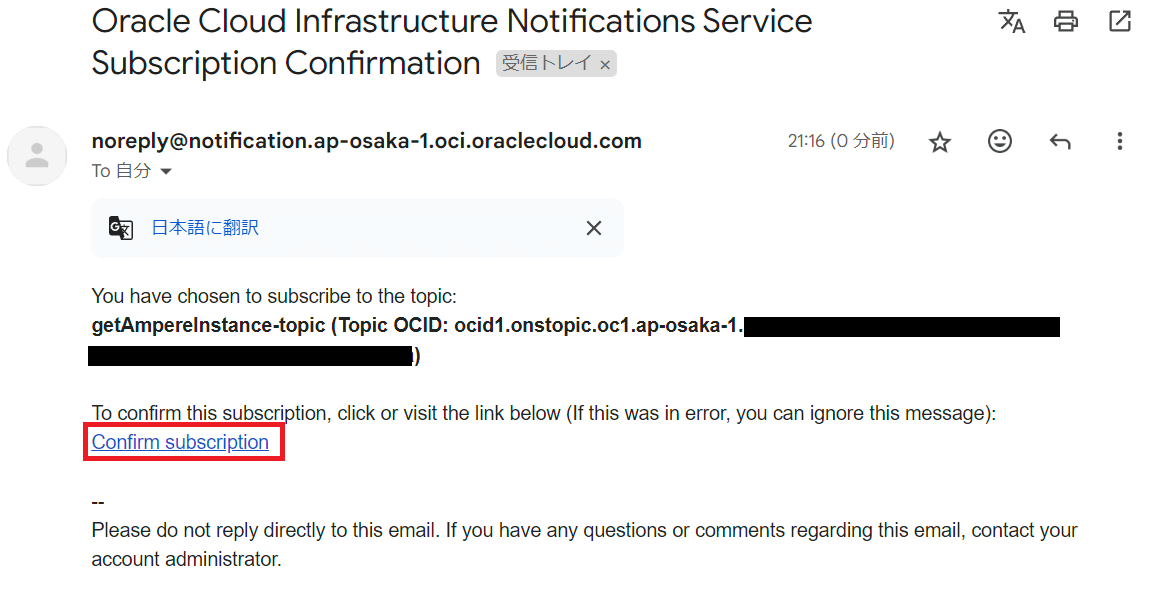
認証用のメールが自動で送信されるので本文の「Confirm subscription」のリンクをクリックします。
OCI CLIからメール送信が出来るかを確認します。topic-id には先ほど作成したトピックのOCIDを指定します。
下記のようにエラーが発生せずに、メールが届いていれば成功です。
[opc@test1 ~]$ oci ons message publish --topic-id <トピックOCID> --body TestMessage --title TestTitle
{
  "data": {
  "message-id": "********-****-****-****-************",
  "time-stamp": null
  }
}
シェルスクリプトの変更
インスタンス作成に成功するまで繰り返し実行を行い、成功時にメール送信を行うように変更します。
※+ になっている箇所が追加した箇所
  #!/bin/bash

  # Set the desired compartment OCID
  export COMPARTMENT_OCID=<your_compartment_ocid>

  # Set the desired shape (Ampere A1 Compute shape)
  export SHAPE=VM.Standard.A1.Flex

  # Set the desired availability domain
  export AVAILABILITY_DOMAIN=<availability_domain>

  # Set the desired instance name
  export INSTANCE_NAME=<your_instance_name>

  # Set the desired image-id
  export IMAGE_ID=<image_id>

  # Set the desired subnet-id
  export SUBNET_ID=<subnet_id>

+ # Set the desired notification topic OCID
+ export TOPIC_OCID=<your_topic_ocid>

+ # Sleep time between retries (in seconds)
+ SLEEP_TIME=5

  # Create an Ampere A1 Compute instance
+ while true; do
+   echo "Attempting to launch Ampere A1 Compute instance..."
+
    oci compute instance launch
      --availability-domain $AVAILABILITY_DOMAIN
      --compartment-id $COMPARTMENT_OCID
      --shape $SHAPE
      --shape-config '{"ocpus":2, "memory_in_gbs":12}'
      --display-name $INSTANCE_NAME
      --hostname-label $INSTANCE_NAME
      --image-id $IMAGE_ID
      --subnet-id $SUBNET_ID
      --assign-public-ip true
      --assign-private-dns-record true
      --ssh-authorized-keys-file ~/.ssh/instance_id_rsa.pub

+   # Check the exit code of the OCI CLI
+   if [ $? -eq 0 ]; then
+     echo "Ampere A1 Compute instance launched successfully."
+     oci ons message publish --topic-id $TOPIC_OCID --title "Ampere A1 Compute instance" --body "Ampere A1 Compute instance launched successfully."
+     break
+   else
+     FAILED_COUNT=$((FAILED_COUNT + 1))
+     echo "Failed to launch Ampere A1 Compute instance. Retrying in $SLEEP_TIME seconds..."
+     echo "Total Failed Attempts: $FAILED_COUNT"
+     sleep $SLEEP_TIME
+   fi
+ done
tmuxのインストール
次に作成したシェルスクリプトをバックグラウンドで実行できるように、tmuxをインストールします。
[opc@test1 ~]$ sudo dnf install tmux
Last metadata expiration check: 1:42:28 ago on Sat 30 Dec 2023 10:10:50 AM GMT.
Dependencies resolved.
=======================================================================================================================================================
 Package                Architecture            Version               Repository                 Size
=======================================================================================================================================================
Installing:
 tmux                   x86_64                  3.2a-5.el9            ol9_baseos_latest          479 k

Transaction Summary
=======================================================================================================================================================
Install  1 Package

Total download size: 479 k
Installed size: 1.1 M
Is this ok [y/N]: y
Downloading Packages:
tmux-3.2a-5.el9.x86_64.rpm                                                                                             1.1 MB/s | 479 kB    00:00
-------------------------------------------------------------------------------------------------------------------------------------------------------
Total                                                                                                                  1.1 MB/s | 479 kB    00:00
Running transaction check
Transaction check succeeded.
Running transaction test
Transaction test succeeded.
Running transaction
  Preparing        : 1/1
  Installing       : tmux-3.2a-5.el9.x86_64 1/1
  Running scriptlet: tmux-3.2a-5.el9.x86_64 1/1
  Verifying        : tmux-3.2a-5.el9.x86_64 1/1

Installed:
  tmux-3.2a-5.el9.x86_64

Complete!
シェルスクリプトの実行
セッション上でシェルスクリプトを実行します。
[opc@test1 ~]$ tmux new -s getAmpereInstance-run
セッション上でシェル実行
[opc@test1 ~]$ ./getAmpereInstance.sh
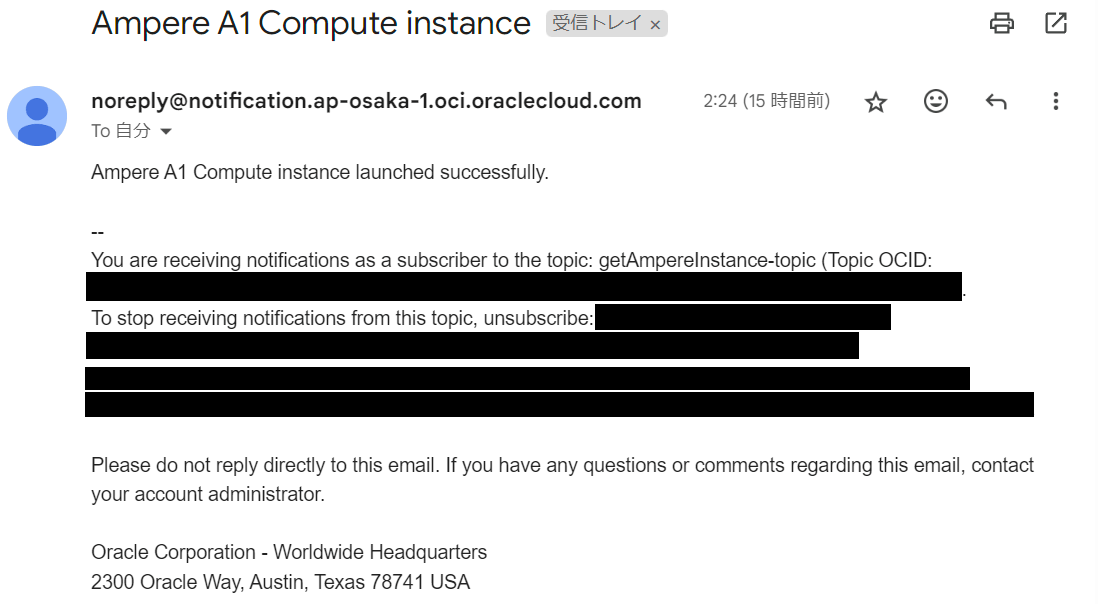
Ctrl-b d でセッションから抜けるあとは成功時のメール送信されるのを待ちます。
下記のようにメールが飛んできたら無事、インスタンスの作成に成功となります。
1 2